
Diagnose the problem: Check if the solar panel is dirty, obstructed, or damaged. Ensure wiring connections are secure and the battery is properly seated. Determine if the sensor is faulty by covering it to simulate darkness and see if the light turns on.
Clean the solar panel and sensor lens using a soft, damp cloth to remove dirt, debris, or snow that may be blocking sunlight and preventing charging. Avoid harsh chemicals that can damage the surface.
Replace the rechargeable battery if it’s old or no longer holding a charge. Choose a battery with the same voltage and type. Upgrading to a higher capacity battery can improve solar light efficiency.
Reset the light by removing the battery for 30 seconds, then reinstalling it. This clears the charge and gives the light a fresh start. If problems persist, consider replacing the entire sensor unit or contact the manufacturer for further troubleshooting.
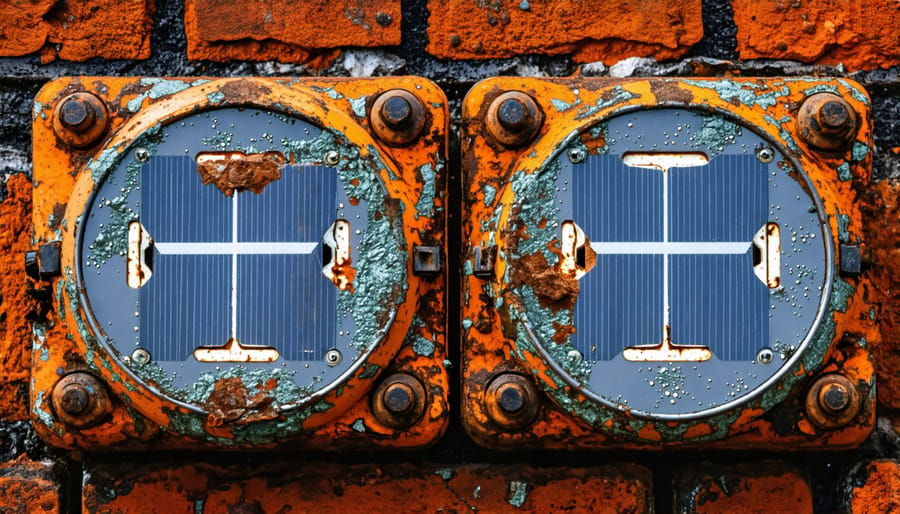
Step 1: Clean the Solar Panel
Supplies Needed
To clean and repair your solar light sensor, you’ll need a few basic supplies: a soft brush or cloth for dusting, rubbing alcohol for more thorough cleaning, a screwdriver to access internal components if needed, and possibly replacement batteries or other parts depending on the issue. Having these tools on hand will ensure you’re prepared to troubleshoot and fix your solar lights, restoring their ability to automatically illuminate your outdoor spaces.

Cleaning Process
To effectively clean the solar panel, begin by gently wiping away any loose dirt or debris with a soft, dry cloth. Next, prepare a mild cleaning solution by mixing a small amount of dish soap with lukewarm water. Dip a soft sponge or microfiber cloth into the solution, wringing out excess water to avoid oversaturating the panel. Gently scrub the surface of the solar panel, paying extra attention to any particularly dirty areas. Rinse the panel thoroughly with clean water to remove any remaining soap residue, as this can interfere with the panel’s ability to absorb sunlight. Finally, use a clean, dry microfiber cloth to wipe the panel down, ensuring it is completely dry before reassembling the solar light. Regular cleaning, especially after heavy rain or wind, can help maintain optimal performance and extend the lifespan of your solar light sensor.
Step 2: Check Battery Connections
Properly functioning battery connections are crucial for your solar lights to operate effectively. Begin by carefully removing the batteries from their compartment and inspecting the terminals for any signs of corrosion, such as a white, green, or bluish powdery substance. If you notice corrosion, gently clean the affected areas using a soft cloth or cotton swab dipped in vinegar or lemon juice. For stubborn deposits, you may need to use a small wire brush or fine-grit sandpaper to restore the metal’s shine.
Next, check the battery compartment for any loose connections or damaged wires. Ensure that the positive and negative terminals are correctly aligned and making secure contact with the batteries. If you find any frayed or broken wires, carefully strip away the damaged portion and reconnect them using electrical tape or a soldering iron, if you’re comfortable with the process.
Once you’ve cleaned and secured the connections, reinsert the batteries, making sure they are placed in the correct orientation. If your solar lights have a switch, ensure it is in the “on” position. By taking the time to maintain clean and secure battery connections, you can significantly extend the life of your solar lights and enjoy their warm, inviting glow for years to come.
Step 3: Replace the Batteries
When selecting replacement batteries for your solar lights, it’s crucial to choose the right type and size to ensure optimal performance. Most solar lights use either AA or AAA rechargeable batteries, typically nickel-metal hydride (NiMH) or nickel-cadmium (NiCd). Check your light’s specifications or consult the manufacturer’s guidelines to determine the correct battery type.
Once you have the appropriate batteries, carefully remove the old ones from the battery compartment. If there’s any corrosion or residue, gently clean the contacts with a soft cloth or cotton swab dipped in vinegar or lemon juice. This will help ensure a proper connection between the new batteries and the contacts.
When installing the new batteries, pay close attention to the polarity (+ and – signs) to avoid damaging the solar light. Place the batteries in the compartment according to the indicated polarity, ensuring they are snugly in place. If your solar light has a battery cover, make sure it’s securely closed to prevent moisture from entering.
After replacing the batteries, it’s a good idea to clean the solar panel and allow the light to charge fully under direct sunlight for at least a day. This will help the new batteries reach their maximum capacity and ensure the solar light functions properly.
If you find yourself frequently replacing batteries, consider investing in higher-quality, long-lasting rechargeable batteries. Look for brands that offer a higher mAh (milliampere-hour) rating, as this indicates a higher capacity and longer runtime between charges. By selecting the right batteries and installing them properly, you can keep your solar lights shining brightly for years to come.
Step 4: Reset the Light Sensor
If cleaning the sensor and checking connections doesn’t resolve the issue, resetting the light sensor may be necessary. Locate the reset button, typically found on the underside of the solar panel or near the battery compartment. Press and hold the button for about 5 seconds, then release. This action clears any stored settings and restores the sensor to its default configuration. In some models, you may need to remove and reinsert the batteries to trigger a reset. After resetting, allow the solar light to charge for a full day and test its functionality at night. If the light operates correctly, the reset has successfully resolved the sensor issue. However, if problems persist, it may indicate a more severe hardware malfunction requiring professional repair or replacement of the entire solar light unit.
Step 5: Test and Troubleshoot
After completing the necessary repairs, it’s crucial to test your solar light to ensure it’s functioning correctly. Begin by placing the solar panel in direct sunlight for a few hours to allow it to charge fully. Once charged, cover the solar sensor with your hand to simulate darkness and verify that the light turns on. If it doesn’t illuminate, recheck all connections and ensure the batteries are properly seated.
If the light turns on but seems dim or flickers, the batteries may not be holding a full charge. Consider replacing them with fresh, high-quality rechargeable batteries. Another issue could be the solar panel’s efficiency. Inspect the panel for any damage or debris that may hinder its ability to convert sunlight into electricity effectively.
In case the light remains unresponsive after charging, double-check the wiring and solder points for any loose or damaged connections. If all else fails, consult the manufacturer’s troubleshooting guide or contact their customer support for further assistance.
Remember, regular maintenance, such as cleaning the solar panel and replacing batteries every 1-2 years, can help prevent future issues and extend the life of your solar light. With patience and persistence, you’ll soon have your solar light shining brightly once again, illuminating your outdoor space with eco-friendly, energy-efficient light.
Conclusion
In conclusion, fixing a solar light sensor is a straightforward process that can be accomplished with some basic troubleshooting steps. By cleaning the panel, checking connections, replacing batteries or the sensor, and resetting the light, you can restore your solar lights to proper functioning. Maintaining your solar lights not only ensures they continue to illuminate your outdoor spaces but also contributes to the longevity and efficiency of these eco-friendly, low-carbon energy solutions. With a little care and attention, your solar lights will continue to provide reliable, cost-effective, and sustainable lighting for years to come, making them a smart investment for any home or garden.